Tuesday 18 December 2012

The last Christmas cards of the year

I wanted to make some photo cards for Simon's doctors and therapists.
This peppermint wheel stamp from WMS Faux Fun Circles seemed perfect to frame my angel's face.
The December Christmas Card Challenge was to use green (I'm thinking Lynn was taking it easy on us so close to the big day), so I made the card up using as much green as I could manage.
I used WMSC128 as inspiration for the first one I made up, creating little ornament banners either side of Simon's photo frame, adding a little colour and highlighting the red and green he was wearing in the photo.
The little green ornaments on the left were stamped with the tiny snowflake stamp from the WMS Compliments of the Season set.  As with all WMS stamps it is exquisitely detailed and stamps and embosses beautifully.  A memory box icicles die cut border seemed perfect to finish it off.

Sunday 9 December 2012

Card à l'orange


I have been putting off the July Christmas Card Challenge for some time now.  I had hoped to try adding some real orange slices to a card but I had a few problems there - they'll look and smell great hanging on our Christmas tree but they just weren't right for cards.
Anyway back to this card.  I've had this paper for over a year now waiting for something special to use it on.  My friend Ruth bought it on a trip to Venice.  I have a whole A3 sheet of it and intend making a few more cards for all my Irish friends here in Luxembourg - because of the orange and green colour scheme and because those birds remind me of images from the Book of Kells.
There was an ornate oval shape in the patterned paper which I thought I would go well with the one of my new WMS Ornate Ornaments stamps.  I don't have the 2012 ornament dies yet so I've just cut it out by hand - which was quite easy so I might not bother buying them now.
Before I go any further do you like that little Christmas tree on the ornament and stamped along the bottom of the envelope.  Well I thought it looked like a Christmas tree anyway.  Turns out it's a snowflake leg and Claire will show you how to create the most exquisite snowflake using it here.   That woman's genius never ceases to amaze me !

I have fussy cut the surrounding pattern to give it depth, as this side view will give a better view.  The border die and smaller embellishments are from Spellbinders Persian Accents - yes not very Irish but it had the oval shape I was looking for.  A little orange organza bow et voila.


As I was assembling the ornament I thought it would be neat to make it detachable and usable as an ornament on the tree or something.  So I stamped another image, attached it to the back (sandwiching the ribbon for hanging) and attached it to the front of the card with a little blutack so it's easily removable.
Here are the two sides of the ornament.  I've stamped a greeting behind the ornament so it won't look to empty with the ornament removed.


This is actually the 2nd card à l'orange I made.  This one was inspired by the brilliant sketch this week at WMS.  Originally I had the image in the middle which was pretty ordinary really, and I didn't think to add a border on the bottom.

Friday 23 November 2012

3-2-1 A recipe for a Christmas card

This is my offering for the September Christmas Card Challenge at WMS - a 3-2-1 recipe (3 Waltzing Mouse images, 2 embellishments and 1 circle). I don't mind saying this one has had me stumped for a while, until I saw WMSC124 and the pieces all seemed to fall into place for me.
The focal image is from the 2011 Holiday Ornaments set and the sentiments are from the Say it Loud Winter Holidays set.
The snowflakes were cut from white glitter card using the Spellbinders Create a Flake 3 set.
The scalloped vellum circle was cut using a Nellie Snellen die and was set off by a teal glitter card circle underneath it.

Peace on Earth


I made this card for my November offering for the Waltzing Mouse Christmas Card Challenge - to use a light source. I was inspired by the brilliant sketch WMSC124 by Karin Äkesdotter and particularly her take on the sketch.  I had it in mind to create a picture postcard scene as she had done and split the sentiment.   My friend Lena came to visit me on Wednesday and brought some goodies to try out - in particular the On the edge trees die by Tim Holtz.  It seemed a good idea to add some trees to the wintry landscape I had in mind for my picture postcard.  The deer surveying this peaceful scene was the smaller Movers and Shapers reindeer die from Tim Holtz. Originally I had intended to stamp a star as my light source, but while searching for black card for my night sky I spied a vellum circle and thought it would serve as the rising moon peeking through the trees.  Papers were from Basic Grey.

Saturday 27 October 2012

Curtains for Santa - October Offering for WMSCCC

The October Challenge for the Waltzing Mouse Christmas Card Challenge is "Pretty in Pink".  I did already have a pink card from June but I've got so many new stamp sets that I wanted to try out and this WMS Opera set seemed to scream pink at me.  The Santa Claus sentiment and cameo are from WMS Santa's Coming set, which I fussy cut out from the surrounding Christmas bauble. The "BE Good" sentiment on the base of card and the cameo image on the envelope were from this set as well.  Everything was then distressed with Worn Lipstick, Victorian Velvet and Tattered Rose Distress Inks.  I attached the sentiment on foam pads to the curtain image and placed this on a vellum doily.  The background paper is from a Cardmaking and Papercraft freebie paper pack from Raspberry Road Designs.  It's a beautiful morning here in Luxembourg, a little cold at 1℃ but the sun is shining which means I could get an outside pic of my card.

Thursday 25 October 2012

A Bunch of Thank You Cards

I had to make a few thank you cards for birthday presents received and for help and presents Simon and I received while we were in hospital last week.
I love this Big Berries Strawberry and this sentiment which come with it, so I made 4 today with varying degrees of post-friendliness.  This one with the ladybirds is by far the cutest (though the least post-friendly - hand delivery only for this one) so I thought I would feature it here.
The strawberry was stamped with Festive Berries and Peeled Paint Distress Inks.  I used Claire Brennan's neat trick of inking up the stamp with versamark and then the distress ink so you don't get that blotchy look.  I then embossed with clear powder.  I also stamped the envelopes to match.

The papers were from a free paper stack from Quick Cards - Summer Goodness by Raspberry Road Designs.  The grass was punched with a Martha Stewart Edge punch.
This is another interpretation of sketch WMSC120 from Waltzing Mouse.


Tuesday 23 October 2012

Schèi Ge-BOO-ertsdag Louis

A halloween themed birthday card I made for Simon's friend Louis.  Unfortunately Simon couldn't attend his party as we were just out of hospital, his hair was matted with EEG gel and we were both exhausted.
The wallpaper was created by stamping the border stamp from WMS Victorian Frippery in purple and embossed in clear - I wanted that wallpaper feel as well.
Using various Spellbinders squares and a Movers and Shapers window die cut I created the window and the frame.  The ghost was cut using a Sizzix original and the bat and spider were cut using a Cuttlebug cut and emboss set. If you look carefully you might see the little moon I tried to create through the window by masking and distressing. The spider web border punch is from EK success.
Louis isn't an English speaker so I knew "Have a Spook-tacular Birthday" would have gone over his head, and opted for "Schèi Ge-BOO-ertstag" a corruption of the Luxembourgish "Schei Gebuertsdag".  I thought I was really clever coming up with this until my son James told me that  the word BOO is unheard of in Luxembourgish.  Oh well perhaps he'll get it one day.
I'm entering this in the Waltzing Mouse Challenge WMSC120, though I've taken a fair bit of artistic licence with Clare Buswell's brilliant sketch.

Monday 8 October 2012

A special card for a special girl

I made this card for Simon's best friend Niamh - for those unfamiliar with Irish names that's pronounced Neev.  When I first arrived here I had had little exposure to Irish names - despite a fairly large Irish contingent in Australia (my sister even did Irish dancing for a while).  I was vaguely aware of the pronunciation of the name Siobhan being very different from what you would expect, but didn't know anyone by that name myself.
Here in Luxembourg I have friends with children named Saoirse, Caoimhe and Roisìn to name but a few and when Niamh was born 8 years ago she was the third Niamh I had met, so I never thought about the pronunciation of her name.
Anyway Niamh had her party on Saturday at a play centre in the city which caters for 10 or so parties concurrently.  The parties are assigned  party rooms but spend most of their time running around in a huge jungle climbing area and are paged at various points to return for food and cake.  Irish names tend to confuse even English speakers so you can imagine what a Germanic/French speaker would make of her name.   Needless to say when Niamh's friends were paged as Nee-am-ha's party - it fell on deaf ears even though it was announced in 3 languages.  To be fair there was so much noise with that many children I could never see a paging system being successful.
This is an easel card and opens to reveal the following scene - stamped with the Heroines - Fairy Princess set from Waltzing Mouse Stamps.
If you're wondering how the card stays open and the princess stays upright, have a look at this side view.  The grass which holds the card open was easy - I punched a strip of grass, used a bone folder to make a fold line and adhered below the fold line to the base of the inside of the card. I then covered the base of the grass with a patterned paper (printed with the sentiment).
The princess was a little more tricky.  I stamped her on strong white card and also pink vellum (for the dress) and some rose patterned paper for the bouquet.  After dressing her I fussy cut her out leaving enough room below her skirt to partially cut (cutting plates placed beyond her hemline) a spellbinders petite scalloped circle - I thought this would look better than a rectangular or square base.   I then made a fold line just below the hemline of the princess' dress so she could stand upright.  A half circle was then folded in half and one side was adhered to the back of the princess, leaving the other half free to fold out and prop her up.  Hopefully the pictures will explain better than I can.
Anyway she loved it and Simon and I had a great time at her party although somewhat deafened by the noise of a hundred or so children having a good time.

P.S. There is a little stamp which comes with the set which says "Kiss Me" but I thought that was going a bit too far after all they're only 8 years old even though they've been engaged for over 3 years now ;0).


Friday 7 September 2012

Retiring to the Bench

A retirement card for my friend's boss.  They've bought him a tree bench which they can't present to him at the party next weekend because the party is in Iceland.
I thought this image from WMS Asian Gardens would be perfect.  The top part is actually a removable tag onto which a photo of the tree bench will be attached.
This card was based on WMSC113.


Thursday 30 August 2012

Waltzing Mouse Stamps Christmas Card Challenge August

This month's Chrismas Card Challenge is to use the lyrics of a song as inspiration.  I had the starting lyrics sorted thanks to this lovely stamp in the Compliments of the Season set, but I thought it should be accompanied by some sleigh bells and I was racking my brain as to what image to use.  I thought of this very old stamp from PSX, mainly because of other lines in the song
In the lane snow is glistening ...
In the meadow we can build a snowman....
and then I noticed the sleigh bells strung up on the fence.  It seemed perfect, and I wouldn't be surprised if whoever designed this stamp had this song in mind.
The image was stamped with Versamark and embossed in black.
As usual I looked through my vast selection of designer papers and decided I would rather create my own background.  A gingham would have been perfect (Gingham and Co is on my wish list) but I compromised on a simple red tartan, stamped with the narrower plaid builder from the Pic-Nic Patterns set using Fired Brick Distress Ink.
I always like to decorate my envelopes so I used this little snowman stamp from the WMS Cottage Christmas set.

I've used sketch WMSC112 as inspiration.  I think the die cut holly leaves really set off the image, and I wouldn't have thought of using them if it hadn't been for the sketch. Thanks Mona !


Monday 27 August 2012

Heart Spin

I had plans for this card when my Dad got sick last year but I ended up getting so caught up with Christmas and then travelling out to see him.  I have finally made it a reality and plan to send it as a very belated birthday card.  His birthday was in June so yes it is extremely belated and I was tempted to let it slide, but you should never miss an opportunity to show a loved one how much you care - especially when he's 88.
It's been a tough year for him - recovering from his emergency surgery late last year has been very slow, and he finally had to hand in his driving licence.  He is now quite profoundly deaf as well (although he may make it out to be worse than it really is to avoid confrontations with my mum - LOL).  
Dad has always loved cars - I don't mean he liked fast cars or had a string of them in the garage (during my childhood I only remember 2 cars - both of them Holdens).  No, I mean he loved cars and always made sure they were well maintained and immaculate.  He was a panel beater so every few years he would give them a new coat of paint to make sure they stayed that way.
Initially I was going to make this a car themed card but I thought this might be a harsh reminder that he can't drive anymore, so I changed it to a travel themed one instead.  He has travelled extensively, mostly around Australia, but he has seen a fair bit of Europe too, especially since I moved over here, so I thought I would make a collage background of travel images and sentiments.
The background was alcohol inked using Pool, Sandal and Butterscotch Inks (and afterwards blended with a little gold).  The various travel themed stamps are from Katzelkraft, Stempelwinkel, Non-Sequitur and Crafty Individuals.  The Heart Wings was cut from plain aqua card and alcohol-inked glossy card stock.  I used Glossy Accents to coat the heart and went over the heart with gold alcohol ink.
It might not be obvious from the photo but it's a penny spinner card.
Behind the heart is a circular track made using Spellbinders Circles (the smallest and 3 sizes up from this).  I've made this little movie so you can see the card in action.

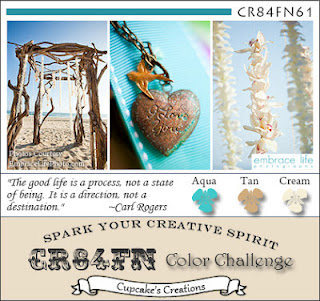
The colours I chose for this card were inspired by the CR84FN61.  Although in the photos my card looks a little on the green side, I assure you it is in reality closer to a blue.


Wednesday 22 August 2012

Anchors Aweigh

When my eldest son asked me to make a last minute birthday card for a friend of his, I immediately thought of this fab sketch again from Julie Aston.  If you haven't already, pop over to WMSC111 and check out the inspiration from the DT and Michief Makers.
As with the last card I made for one of his friends, my son wanted an anchor in the design (it's an "in" thing with his group of friends which he seemed reluctant to elaborate upon).  My Island seemed an obvious choice, however I had to be careful it wasn't too similar to the previous card I had made for a member of his group - also using My Island with a purple and yellow plaid background.

In the end I opted for an alcohol inked background using Pool, Cool Peri and Sandal alcohol inks, overstamped with a variety of shells.  
I adore stamps to do with the sea so I have quite a lot of shell stamps.  I picked a few that were similar in size and style and randomly stamped these using Jet Black Archival Ink.
To create the sunset panel, I stamped the solid background stamp from My Island twice horizontally with a lighter blue on top.  I then stamped the sunset rays upright (as it was intended) in Spiced Marmalade  and upside down (to give the impression of reflection on the water) using Peach Bellini.  I then trimmed the rectangle to fit the width of the sunset rays.  The sandy beach was stamped with the base stamp (usually used to stamp the water) in Spiced Marmalade and Mustard Seed (in order to cover the blue underneath).
I then stamped the umbrella and the beach hut  on the "sand" with Archival ink.
I stamped part of the solid background stamp from My Island onto a scrap of white card using the same blue as the ocean, and overstamped this with a sentiment from Asian Gardens, attaching it to the side of the sunset panel.
I cut a teal coloured A4 sheet of card down to create the DL base card and used the leftover piece to die cut a Tessatina border.  I coloured some twine with Broken China DI and wrapped this around the card twice and attached the anchor with a brad.  The anchor was die cut using a sizzlit die.  I then partially covered it with versamark and embossed with a Verdigris embossing powder to give the impression of barnacles.
This card was a lot of fun to make!  Hope you enjoy it too !

Monday 20 August 2012

Tickled my Fancy

This week's Waltzing Mouse Sketch Challenge really "tickled my fancy".   I love creating my own backgrounds - I have so many patterned papers but I often can't find exactly the right colour(s).  Of course stamping on an alcohol inked background is my absolute favourite, and so here is this week's entry for WMSC111.  Do pop over there and check out the amazing inspiration !

The alcohol inks used were Ranger's Salmon, Shell Pink and Sandal with just a touch of Watermelon.  The stamps were from an Artemio set - I've been meaning to break this out for a while and a background of feathers seemed perfect to complement this Marianne D bird cage, and the little Waltzing Mouse Bird inside - finally I have a bird which is the right size for this die.  Both the twiggy tree branch and the bird are from Asian Gardens set, as are the little flowers on the twig and surrounding the framed sentiment (in reality hiding the pop dots).  I have to thank Claire for this set - I was the lucky winner of WMSC110.  The frame and sentiment are both from the Fancy Phrases set.   The bird, sentiment and flowers were stamped onto vellum.  The envelope was stamped with another two images from the WMS Asian Gardens set. Black ink used was Archival Jet Black, the pink was Brilliance Pearlescent Orchid.


Here are close-ups of the bird (can you make out the little pink flowers on the twig) and the sentiment.  

Hope this card tickles your fancy !

Saturday 18 August 2012

Piece of Cake

This is the 1st time I have participated in a WMS Blog Waltz and I'm not off to a great start.  I have had since the 1st of the month to come up with an idea and as usual it's not until the last minute that I finally get an idea.
The theme for this month's Waltzing Mouse blog waltz is Birthdays.  There are some amazing projects over there why not take a look !


I tried to incorporate what I consider to be the most important aspect of a birthday and that is of course the cake and candles.
But I also wanted to create a sense of celebration and what better way than with the bunting in the WMS Bitty Banners set.  
The papers are from Basic Grey Cupcake - so lot's of birthday imagery there too!
The sentiments (one is hidden by the cake when the card is open) are both from Compact Sentiments.
As you can see it's an easel card.  The base of the cake stand has been scored and folded - half stuck onto the inside of the base the other half supporting the cake upright and providing the prop to keep the card open.
I found this not only added an extra dimension but also gave me a bit more room to play with, which I needed because this die cut is quite large - they don't call them Sizzix Bigz for nothing - and I didn't want to hide any of the lovely bunting.
This is the first time I've attempted this kind of easel card and I was a little worried about the mechanics of it but it worked out okay.  
I forgot to take a photo of the card unopened but you can see in the last photo the little sentiment which will eventually be hidden when the card is open.


Wednesday 15 August 2012

Berry Sweet Birthday Wishes

I am so behind on my birthday cards.  This is for my sister and I'm too embarrassed to admit how late this birthday card is.
Anyway I thought I'd make her a Berry card while she still is a Berry - let me explain.
Currently her surname is Berry but she has recently become engaged and once married I dare say she will change her name (Berry is the surname of her ex-husband so why would she keep it).  Her fiancé's name is Bartlett, so she'll be swapping one fruity surname for another!  I'll be on the look out for pear stamps soon I guess ;)
This card was based on WMSC110.  I thought this sketch would work well with the strawberry on a gingham tablecloth idea I had in mind. This sentiment from Compact Sentiments also seemed perfect.
The border was cut with my new Memory Box Tessatina die.


Tuesday 14 August 2012

WMS110 - A Fine Mess


Isn't this a great sketch this week at the Waltzing Mouse Sketch Challenge.   My eye was drawn to 2 things on the sketch - the bow (aargh I struggle with them) and the spots.  It may have been the placement of the little Waltzing Mouse watermark just below them - but I saw ink splodges in those spots.
Unable to put that idea aside, I pulled out my calligraphy themed stamps and came up with this little card for my mother-in-law who is both an avid and accomplished calligrapher.
The sentiment is from one of my latest WMS sets - Compact Sentiments which fitted very nicely into this border stamp from the Fancy Phrases set which coordinates perfectly with the Fancy Tags from Spellbinders.
The pen and ink pot are from Cherry Pie Art Stamps, and the calligraphy block is from Writing Set from Clearly Impressed.
The green/blue background was created using Pool, Sailboat and Lemonade (Willow may also have featured as well) Adirondack Alcohol Inks.
The border strip I picked up on my last trip to Sydney.  It comes in a roll and is adhesive backed.  You can't see from the photo but it's velour-like - lovely to touch.
I was thinking of stamping some ink splodges but decided the black crystals would serve the purpose and lend some elegance at the same time - a fine mess !

Friday 10 August 2012

Home Sweet Home

I have been meaning to try "wainscoting" for some time now ever since I saw Nikki Woodward's gorgeous creation in the  Waltzing Mouse Blog Hop for June.
Mine is a much simpler version of hers - with just embossed lines, not rectangles.  I did CASE her use of the Paris Nouveau border element to create the wallpaper though.
I thought I would furnish my "room" with a chandelier (freebie stamp from Craft Stamper) and a standing lamp from the Chatsworth Vintage Collection by Papermania.  The sentiment is also from this collection - this was the closest I had to a House Warming greeting.
I hope the crystals stand up to a trip to Australia.  I usually place an A6 sized piece of bubble wrap in the envelope to increase their chance of survival.

Thursday 9 August 2012

Thanks Berry Much

A little thank you card for a friend of mine, to thank her for a great evening last week.  Good friends, good food and good weather - what more could you ask for.
I thought I'd use my new Big Berry set which arrived on Monday.  Isn't it fab!
Couldn't believe my luck when I saw the freebie paper pack which came with this month's Card and Papercraft included a background paper with strawberry jam jars on it.  The polka dot paper is also from this set.
I stamped the strawberry using Peeled Paint and Fired Brick distress inks and embossed with clear powder, and then cut a circle shapes with a Spellbinders Circle and Petite Scalloped Circle.  The white circle seemed a bit bare with just the strawberry on it so I masked it off, and overstamped with the floral border stamp from Pic-Nic Patterns (fast becoming my favourite set).
I fiddled a bit with the sentiment - initially stamping on white and cutting with a Spellbinders oval, but it was too overcrowded, so I decided to just stamp the sentiment on the background in black.
I used the sketch from WMSC109 as inspiration for the card, keeping pretty true to it except that my card is A6 not square.
I always like to make a matching envelope, so I overstamped the strawberry on it.  However these envelopes are really thick and the ridge from the underside affected the stamping.  I should have tried a piece of funky foam inside the envelope to get a better impression.  Will probably redo it.

Friday 3 August 2012

Travel the World Over

 A very belated card for my lovely niece Natalie.  She loves to travel so I thought the Paris Nouveau set combined with this luggage tag from Sizzix would fit the bill as well as a quote from Ralph Waldo Emerson printed using Word.
This is based on WMSC108 which I have flipped 90 degrees left.

Friday 27 July 2012

Mahalo

For my dear friend Maggie, for helping me out at Simon's birthday party.  To help out at an eight-year old's birthday party when your own children are twice that age is above and beyond the call of duty.
This card is based on WMSC107.
Stamps used are from the My Island set and Pic-Nic Patterns.  Mustard Seed,  Spiced Marmalade and Crushed Olive Distress Inks were used as well as Slate Chalk ink for the sentiment and palm trees.
The card base was a yellow gingham.

Friday 20 July 2012

Hit the Beach

Just one of the many cards I am so behind on.  This for my niece and god-daughter Chantelle.  I imagine that she's looking forward to the end of the Australian winter and the time when she can hit the beach.
She's a surfer as is her fiance - at least when life was more leisurely they were.   They're both training to be teachers and working when they're not studying, so not sure they get much of a chance.
This card is based on WMSC106 rotated 180 degrees.  The background was created with the Pic-Nic Patterns plaid builders using Wisteria and French Blue Chalk Inks.
The central image was from the WMS My Island set, as was the sentiment.  The vintage beach chair ticket stamp was from a Crafty Individuals set, and the little sea gull is from a sizzlit die cut.