Wednesday 27 June 2012

A Pink Card for June Challenge

I thought I had better make another card for the WMS June challenge, problem was the paper I used was a one-off in a paper pad I bought a few years ago. However there was a pink version, and I thought it might make an ultra feminine card for either Simon's godmother or my sister and her girls.  Because the stitching was very subtle (and because I was a bit braver) I stitched a double frame on the card this time.  I'm off to look for other papers in my stash which have a host of different Christmas greetings on them that might also be suitable. Some bling will also go down well I think.
A pity I didn't think to copy the paper before cutting it.  This would probably have gone down well at the Think Pink fund raising in October.

WMS Christmas Card Challenge for June - to use sewing

This was really challenging. I've always admired cards with sewing on them but my own attempts have usually been disastrous. This was going okay until I decided to do a little zig zag in the bottom right corner. I could feel the machine labouring and was afraid of a jam.  It didn't jam but the stitching wasn't even and I did go a bit crooked.  Oh well at least the recipient will know it's hand made !
The largest of the WMS Vintage Ornaments was stamped with Brilliance Rocket Red and embossed with clear powder.  The greeting in the inner oval is from the WMS Compliments of the Season.  The inside greeting/stopper for easel is from WMS A Cottage Christmas.  This was cut out using a petite oval and placed on top of a Fancy Tag for added interest.  Naturally I had to decorate the envelope so I stamped the smaller of the Vintage Ornaments in Versamark and embossed with white. 
I think I've been watching too much Lord of the Rings lately - the twine at the top of the ornament makes it look like a Rohirren Rider's helmet don't you think.  I suppose inspiration comes from all kinds of sources !

Tuesday 19 June 2012

A Little Bird

I thought while I still have Jaine's Cage Bird Die, I'd use it for another card.  I started making this card in pink and brown but found I couldn't get a clear impression on brown card stock without using one of the pearl embossing powders from Heritage and since I don't have a pink pearl,  I switched to purple.  Note to self - must search for a nice bright pink embossing powder.
This is essentially the same as the Blue/Brown Christmas cards I made last month, with the exception of the monogram which was stamped with a Just Rite set in brown pigment ink and embossed with clear.
I cut a purple envelope from a Zeeman card set down to size so it served as a liner - it's a little difficult writing on the brown, and stamped it with 2 sentiments from the Fancy Phrases set and a small branch stamp from the Paris Nouveau set.  This is for a friend from a group of us.

Friday 15 June 2012

Belated Birthday Wishes

I had a piece of an alcohol inked background left over from my last birthday card (which was made so last-minute that I didn't have time to take a photo).  I knew it matched perfectly with this coral pink card (from Zeeman) because that's what the last card was made with.  Unfortunately I can't really remember what colours of alcohol inks I used, in case I want to repeat the combination.
Jaine very kindly loaned me her TH! Caged Bird for another project and I thought while I had it I'd use it for this birthday card.  I added a few branches from a Marianne D die, a Marianne D flower and a framed sentiment. The Fancy Phrases set comes with several frames and loads of sentiments.  Laid askew like this, I think it resembles a ticket - not a bad image to go with a caged bird and key - which I picked up a couple of years ago in Spotlight (Australia) on a bargain table.
If you look closely you can see the cage has been overstamped with a Stempel Winkel Music Score stamp, and I adhered the cage with pieces of double sided foam tape to give it a bit of depth. After trying various inks, the Maroon Archival Ink worked best.

Thursday 14 June 2012

Deck those Halls

Another 6 cards finished for the Waltzing Mouse Christmas Card Challenge.  This was for April's Challenge - to use a Bird in the design.  I had the idea of a bird carrying a piece of mistletoe or holly in his beak, which seemed to fit perfectly with this greeting from the Vintage Ornaments set.
I cut the bird from a champagne coloured glitter card and distressed it slightly with Distress Inks - Festive Berries on the bottom and Aged Mahogany on the top.  The holly was cut from green card using the Tim Holtz Holiday Lamppost die, coated with Versamark and embossed with sparkly green embossing powder (I didn't have the right green in my glitter card stash). The acorn was cut using a Spellbinders die and the Festive Greenery decorative strip die was used to cut the greenery.
The label was stamped with the Deck the Hall Stamp from the Vintage Ornaments, framed with the square frame from the Fancy Phrases set, and cut using a Spellbinders Fancy Tag.
The paper was from a freebie set - Berry Merry, which came in one of the issues of Cardmaking and Papercraft.
We've had a (no doubt short) respite from the rain and the wind, which meant I could take photos outside - my camera doesn't really take good photos inside.

Friday 8 June 2012

Christmas Card Challenge for May Finished

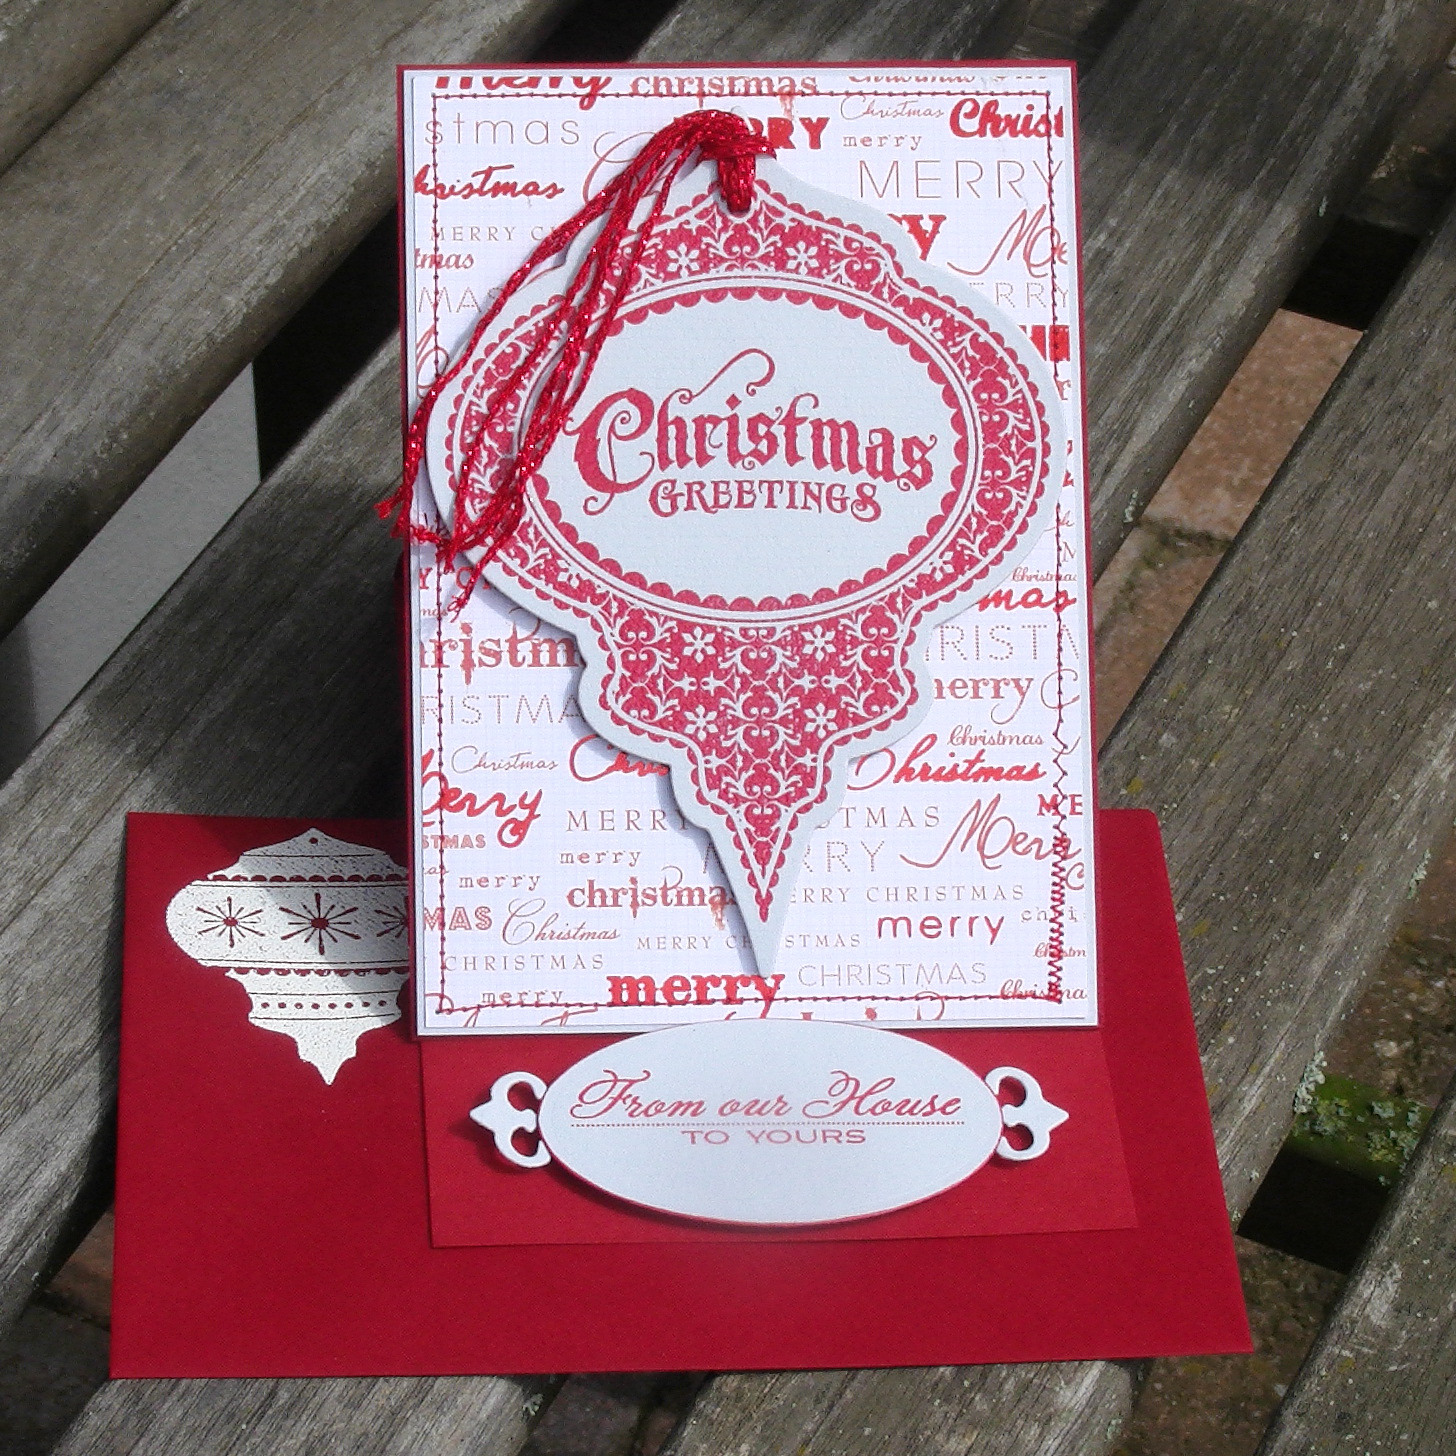
This challenge for May was to incorporate chipboard into the design.  I decided to just use a chipboard element so as not to detract from the lovely design of this ornament (from the WMS Vintage Ornaments set) - and a heart seemed the obvious choice teamed with the "with Love" sentiment (also from Vintage Ornaments) and the "from our House to Yours" sentiment from the WMS Cottage Christmas set.
The heart was cut from grungeboard topped with red glitter card.  After cutting out various sized and proportioned hearts, I decided on this heart which was cut using the Tabs, Heart and Double Box Die from Sizzix.  The photo really doesn't do it justice - these hearts look good enough to eat.
The paper was from a freebie pad which came with a magazine, and the leather effect card had been in my stash for ages.  The ornament and sentiments were stamped with "Festive Berries" Distress Ink and embossed with Sparkly embossing powder.  Festive Berry and Antique Linen distress inks were used to distress the background paper, the ornament and the sentiments, and the twine was coloured with Festive Berries as well.
I was thinking my fingers would be stained with Festive Berries for weeks to come but it is fading (thank goodness).  What I love about this Vintage Ornament stamp/Heirloom die combination is if you make a mistake on the centrepiece (for example some misplaced Festive Berry fingerprints), you can always restamp the oval, cut it out with a Classic Oval die, affix it with a couple of sticky fixers, et voila.  Not only is your booboo hidden, it looks like part of the design.
Now I've nearly caught up with the challenge, although I haven't posted anything to the WMS gallery yet, I haven't ever put my work up for a challenge before and I'm a bit worried it's not good enough.  You should see the standard of work posted there.


March WMS Christmas Card Challenge Finished

Another 6 cards finished for Christmas.  The Challenge for March was Blue and Brown.  Not much of a challenge as I love this colour combination.
I thought I would try using the gorgeous Paris Nouveau stamp set which complements the Labels 25 from Spellbinders.
I didn't have any suitable background paper so I created this background by embossing with the Swiss Dots embossing folder (from Cuttlebug) and inking the raised ares with brown ink.  I got a bit fed up with this embossing folder only being able to emboss A6 cards so I modified it so I can emboss continuously.  I've cut one of the sides off so that it finishes with the dots and doesn't have a border.  I can now line up the card to continue the embossing - as you can see this card is wider than A6 but you'd have to look very hard to see where the join is.
The brown card was from a Zeeman Card Blanks/Envelopes set and I stamped the label with a light blue pigment ink and embossed with Blue Pearl (from the Heritage Stamp Company).
The greeting (from the Compliments of the Season set), was stamped on the same blue card as the background, cut using a spellbinders circle and partially embossed (top and bottom) with the Swiss Dots as per background.  The left side of the card looked a little empty and thought these Fleur de Lys corner elements from Spellbinders might fit the bill - can't say I'm disappointed.  I didn't have any brown ribbon so I cut strips from one the envelopes in the Zeeman set and used it to set off the label.

Wednesday 6 June 2012

More Christmas Cards

Yet another batch of Christmas Cards.  I called this design Upon a Midnight Clearing, and is very similar to what I made last Christmas, with the inclusion of the branches hanging down and creating the impression of being in the forest and looking out onto a clearing.  I also just cut the snow by hand this year instead of using the Abstract Decorative Strip Die - I'm getting braver!
The forest branches and pine cones were from the WMS set Festive Foliage.  I stamped and cut out another layer of branches which I adhered with sticky fixers to give the impression of depth.
The branches were embossed with green pearl embossing powder from the Heritage Stamp Company in Edinburgh.  I've had this for ages as I've not really embossed much for years.  I hope the company is still there because they sold the best embossing powder I have ever used,  and I'm nearly out of the green pearl now.  The pine cones were embossed with clear to avoid losing any detail.
The stars were embossed with Diamond White from Judikins.  The Reindeer was from the Mover and Shaper set from Tim Holtz, which I coated with Versamark and embossed with Copper Embossing Powder.
This design is for the WMS January challenge to incorporate the sky.  Another 6 cards finished and I'm already planning all the things I can do in December since I won't be panicking about Christmas Cards !