Wednesday, 8 March 2023

Shamrock 60th Birthday

A good choir friend of mine turns 60 later this month and she's also retiring.  She's having a big party and the whole choir is invited so I've made up this A5 sized card so everyone can sign!  She's Irish, and despite living in Luxembourg for many decades now and speaking multiple languages, her Irish heritage is still very much part of her identity, so shamrocks seemed an obvious starting point - especially with St Patrick's Day approaching and the plethora of challenges at the moment from which to draw inspiration.   

 I originally had a cleaner card in mind and cut a shamrock cut from this paper which I was going to use as a spinner element but I was daunted by so much white space - it's an A5 card front so none of my background dies or embossing folders were large enough.   So I changed it to a patterned background and my plan was to cut a golden shamrock but honestly it looked a little too gimmicky for such an important birthday celebration!

So I thought I'd use a butterfly as the spinner element - she loves butterflies!  The first butterfly I cut was a Tim Holtz Brushstroke Butterfly - an NBUS item I'd been dying (excuse the pun) to use!   It looked lovely but it had an awkward centre of gravity and didn't spin very well!  It will have to wait for another day - another St Patrick's Day perhaps because it was cut in green and gold!  Instead, I used this old favourite Tattered Lace Oriental Butterfly die. 

Since I didn't have any gold card stock strong enough to cut it from, I went with green.   A spinning element really needs to be sturdy but I didn't relish the idea of layering a die cut this intricate (and big)! This green card stock is quite thick, so sturdy enough to withstand the rigours of spinning backwards and forwards across a card front.  I then added gilding wax to the butterfly!  Previous attempts with gilding wax were unsuccessful - I had underestimated how light your touch needs to be!  Watching a recent Chrissie Stokes video I realized where I was going wrong and was much happier with this effort! 

 I did look like a Bond villain afterwards through, with my gold finger! 🤣 

Then it was just a matter of sorting out where to put Happy Birthday, her name and a "60" using dies from my stash (the shamrock I used in place of the 0 was a really old punch).  I added a "sweet" (Deco Time) before the 60 - she is after all pretty excited about her upcoming retirement!  I added gilding wax to all these and then glossy accents - I love how the gilding wax has highlighted the embossing on the letters in her name.

The inside is an A4 sheet folded attached to the right side of the card base.  I've added a good luck sentiment and a potted plant - for luck!  I might also add another folded sheet on the other side (with perhaps some school items because she's retiring from teaching) - there will need to be space for 20 + people to sign! 

Here's a video of the butterfly in flight


I would like to enter the following challenges


Traumfabrik Challenge #113 which has the movie Luck as its inspiration this month

Double D Challenges which has this brilliant inspiration photo

Thanks for stopping by, I hope you go away a little inspired!  Your visits and comments always brighten my day!  And if you leave a comment, I’ll know you were here and how to find you!

Kate

Tuesday, 7 March 2023

Revealing Gingerbread Men

Challenge #135 has just gone live at The Holly and Ivy Christmas Challenge and here is my DT card!   As usual my team mates have created some wonderfully inspiring Christmas cards so be sure to pop over and check them out!  And of course we love to be inspired by your creations as well!

This one was a lot of fun!  I cut and stacked up a few cookie jar die cuts from Kraft card stock, stamped "Gingerbread" on the front and then "glazed" it with glossy accents.  I then wrapped a piece of red and white bakers twine around the top and added a few holly leaves.  Even though it's actually a candy jar die, I think it looks like an old fashioned cookie jar and a darned festive one at that!


I then set about creating a little scene for my gingerbread cookie jar - well a pretty yellow gingham table cloth at any rate!  

A die cut "sweet" sentiment above the cookie jar and a stamped "Christmas Wishes" and it could have been complete BUT as you may know by now, I often like to add little surprises on my cards!

So, I stamped this bunch of gingerbread men in the space behind where my gingerbread jar would sit on the table, attached a magnet to the back of the cookie jar and another magnet behind the front panel.  Et voila ... now you can see what's inside the gingerbread jar!  And you have a cookie jar fridge magnet - a card with a gift!


I really should have stamped them on white card stock and cut them out because you can see the table cloth though the colouring!  But I don't have a die for this stamp and I hate fussy cutting.  They are adorable aren't they!  They're from a Waltzing Mouse Stamp set called Chistmas Candy Jar Fillers and the Sweetie Jar die is also from WMS and despite having bought it in 2014, this is the first time I've actually used it!  The stamp set only has individual stamps for the jar and the lid, and I'm not very good at lining up stamped images - esp when they need to be die cut afterwards.  I'm so glad I figured out how to finally put it to use!

O no!  One of the gingerbread men escaped - I doubt I'll catch him now, even if I run, run as fast as I can! 😜

I'd like enter my card in NBUS Challenge #48


I'd also like to enter Krafty Chicks Challenge #653 - it's a Stamp Act Week and for once I've used stamping on this card!


I'd also like to enter the March Happy Little Stampers Christmas Challenge (hooray they're back)!  I didn't use the candy cane option on my card but this baker's twine is perhaps not a bad substitute!


Thanks for stopping by, I hope you go away a little inspired!  Your visits and comments always brighten my day!  And if you leave a comment, I’ll know you were here and how to find you!

Kate

Thursday, 2 March 2023

Elegant Leaves


Time Out Challenge #233 has just gone live and this fortnight, we are challenging you to be
Elegant!  


I immediately thought black and gold and this gorgeous Altenew Leaf Mix Die Set!   I searched through my pads of foiled papers and found this elegant cream with gold stripes.  I cut a stitched rectangular panel then set about cutting some leaves from gold and black snippets and arranging them on the panel. I was able to use some of the overlay cut out pieces to fill in the blank space between the leaves and I used a scattering of faceted black pearls until I was pleased with the layout.  I realised as I was clearing up afterwards,  that the cutout circles from the middle leaf could also have been used - with a few applications of glossy accents they're almost indistinguishable from flat backed pearls and much more post-friendly!  Needless to say I've stored these little circles away for a future project - little black circles always come in handy!!

I needed a thank you card and this small but very elegant little "thanks" from Verve Autumn Thanks (sadly Verve is NLIB) fitted the space under the leaf arrangement perfectly - again cut from a snippet of gold!   I used one the elegant overlay dies from the Leaf Mix set and more snippets of gold to decorate the inside and envelope. 


 What does elegant mean to you?  We’d love to see your interpretation in our gallery!  This challenge is sponsored by Altenew and our winner, as voted by the DT, will receive a $25 store credit.  They will also be invited to guest design with us in a future challenge.  Details are over at Time Out as well as heaps of inspiration from my  fabulous fellow DT members and our very talented guest designer Nora Noll from A Creative Touch.   Why not pop over for a visit with Nora and say hi - you’ll find tons of gorgeous inspiration!

Just a few challenges I'd like to enter are

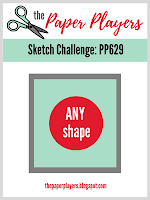
Paper Players Challenge 629 with the following sketch


Inspirational Challenge #284 - Real or Faux Stitching - my panel has faux stitching

The February Sisterhood of Crafting Challenge - My panel has stripes

Thanks for stopping by, I hope you go away a little inspired!  Your visits and comments always brighten my day!  And if you leave a comment, I’ll know you were here and how to find you!

Kate